
环境准备#
在 VSCode 扩展商店搜索 python,安装 Microsoft 官方 Python 插件即可。
基础版本管理#
安装多版本 Python#
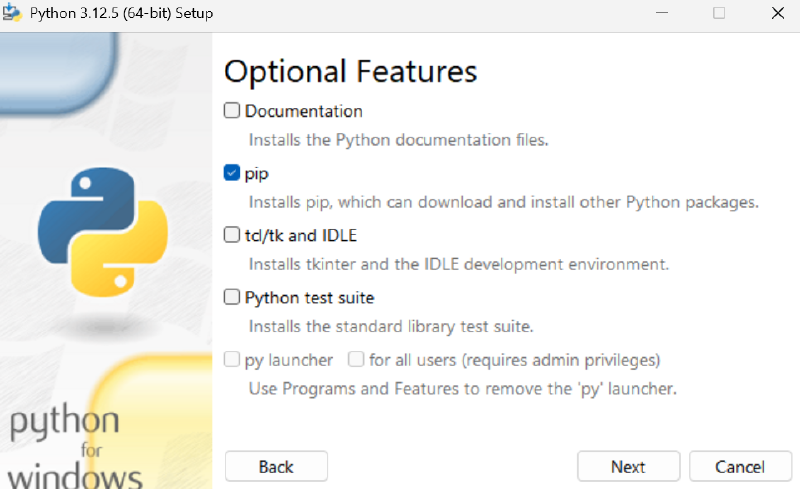
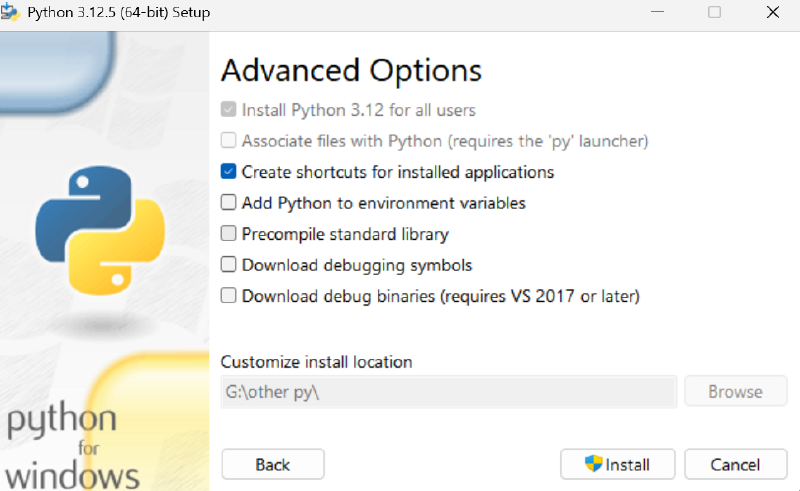
系统已将 Python 3.14 安装并写入系统 PATH,但某些框架(如 Flask)目前更适合 3.10–3.12 版本,因此需要额外安装 Python 3.12。此时注意两点:
- 不要再添加进系统环境变量
- 参考安装选项:
创建虚拟环境#
先检查已安装的 Python 版本:
1py -0应输出 3.14 和 3.12 两个版本。然后创建并激活虚拟环境:
1py -3.12 -m venv .venv
2.venv\Scripts\Activate.ps1
最后安装依赖:
1pip install flask项目结构#
推荐的项目目录结构:
 1myproject/
 2├── pyproject.toml
 3├── README.md
 4├── LICENSE
 5├── .gitignore
 6├── tests/               # pytest 测试
 7│   └── test_xxx.py
 8└── src/                 # 核心源码
 9    └── myproject/
10        ├── __init__.py  # 必须
11        ├── main.py
12        └── utils.py
pyproject.toml 配置示例#
 1[build-system]
 2requires = ["setuptools>=61"]
 3build-backend = "setuptools.build_meta"
 4
 5[project]
 6name = "myproject"
 7version = "0.1.0"
 8description = "Example project"
 9readme = "README.md"
10requires-python = ">=3.11"
11
12dependencies = [
13    "requests>=2.32",
14    "rich>=14.0"
15]
16
17[project.optional-dependencies]
18dev = [
19    "pytest",
20    "ruff"
21]
22
23[tool.setuptools.packages.find]
24where = ["src"]
25
26[tool.ruff]
27line-length = 88安装与开发#
确保已有 pyproject.toml 和 __init__.py,然后以可编辑模式安装:
1pip install -e ".[dev]"Python 会将当前项目以 editable 模式 安装到当前虚拟环境中。之后修改 src/ 中的代码会立即生效,无需重新执行 pip install。
基础检查#
1pytest             # 运行 tests/ 中的自动化测试
2ruff check . --fix # 检查代码风格问题
3ruff format .      # 统一代码格式
安装后,无论在哪个目录都可以通过以下方式导入项目代码:
1import myproject
2from myproject import main构建与发布#
构建分发包#
1python -m build会在 dist/ 目录生成可分发的包文件。
发布到 PyPI#
1twine upload dist/*常见问题#
PowerShell 脚本权限#
Windows 的 PowerShell 默认没有执行脚本权限,导致无法自动激活虚拟环境。以管理员身份执行:
1Set-ExecutionPolicy -Scope CurrentUser RemoteSigned选择 Y 确认,即可正常使用 venv 虚拟环境。
若要还原设置:
1Set-ExecutionPolicy -Scope CurrentUser Undefined